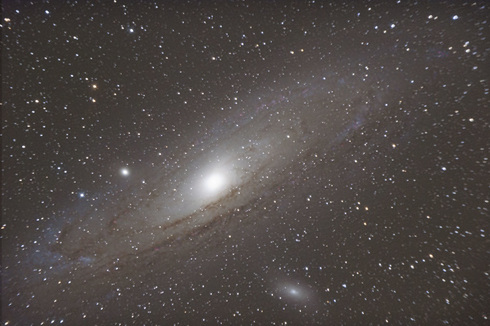
 Andromeda Galaxy, also known as Messier 31 or M31, is a spiral galaxy located about 2.5 million light-years away from Earth. Located in the Andromeda constellation, it is the closest major spiral galaxy to the Milky Way, where our solar system is, but it isn’t the closest galaxy. It is also the largest galaxy of what is called the Local Cluster - a collection of more than 54 galaxies including the Milky Way. While Andromeda is the largest galaxy in the Local Cluster it may not be the most massive. It has a diameter of about 165,000 light-years and contains at least 200 billion stars.
0 Comments
Our group chose the Canon 6D DSLR camera for our first astrophotography outing because it was the only one available. Some drawbacks from this camera is having no tilt screen which makes composition and focusing harder and it doesn't have an intervalometer which means we would need an additional accessory. But the benefits of the camera is: it's the lightest full frame DSLR and it has a great low-light high ISO performance.
Galaxies:
Set Up Video #1
Set Up Video #2 .1. Stand the tripod upright and pull the tripod legs apart until each leg is fully extended. 2. Slide the accessory tray over the central rod so that each arm of the tray is pushing against the inside of the tripod legs 3. Make sure mount is leveled 4. Hold the equatorial mount over the tripod head so the azimuth housing is above the metal peg 5. Push the knob located on the central rod on the underside of the tripod head upward and turn it clockwise to hold the equatorial mount firmly in place. 6. Tighten the hinges of the mount so it wouldn't move 7. Screw on counter weight rod to mount 8. Slide counter weights onto the rod and tighten them securely 9. Screw on corrector, visual backing and star diagonal onto the telescope 10. Attach telescope and tighten securely 11. Loosen the hinges of the mount that you tightened in step 6 12. Move the counterweight to a point where it balances the telescope 13. Plug in remote into hand controller hole 14. Plug in wire from declination to disc point 15. Attach to power pack
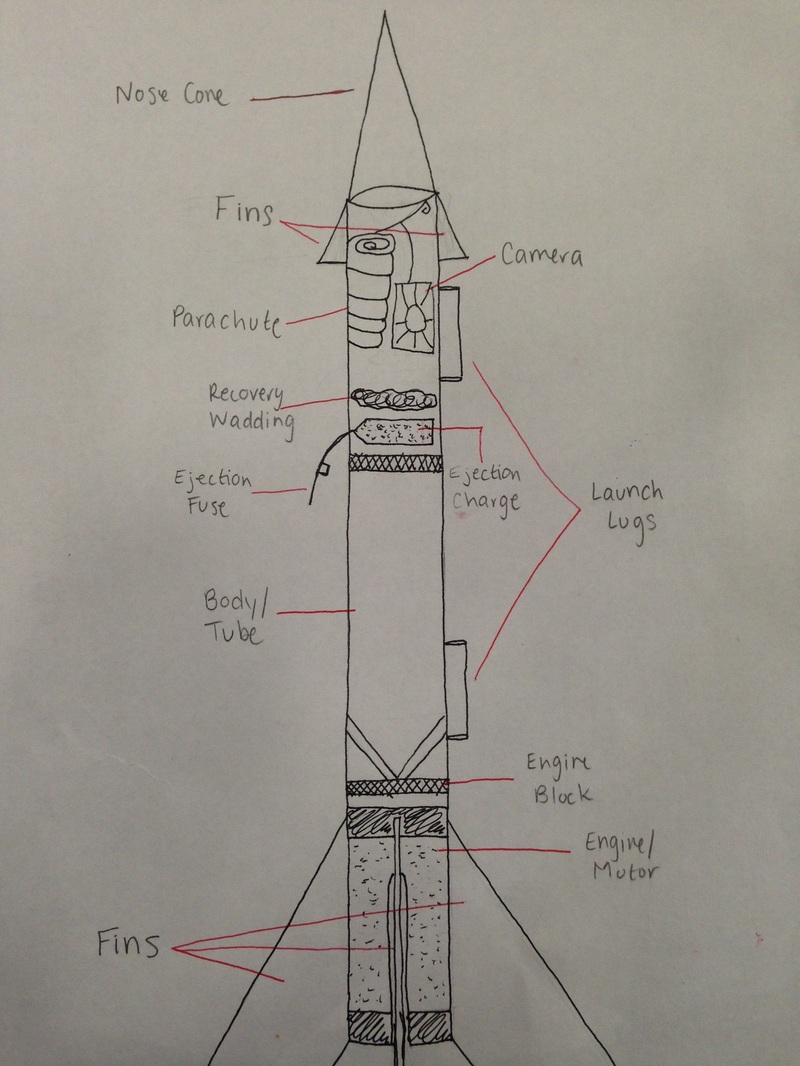
Schedule: September 22- Get plans approved September 23- Build body of rocket September 26- Attach engine block. Start to build parachute recovery wadding and ejection charge September 27- Attach necessary equipment inside. Start to build nose and fins September 28- Attach nose and fins September 29- Build tester engine September 30- Launch rocket. Fix flaws of rocket and engine. October 3- Launch rocket with actual engin Materials List:
- Balsa Wood Block - Balsa Wood Sheet - Tissue Paper - Wood Glue - Super Glue - Borax - Kraft Paper - Cutting Tool - Plastic Bag - 1'' PVC Pipe - Sand Paper - Tape - Large Rubber Band - Camera - String - Plastic Tube - Fuse - Empty Motor Casing ReflectionI feel more comfortable with handling rockets and also with more knowledge about how to build rockets. I think learning more about the rockets made me more comfortable when working on them. If I was able to make a third rocket I would use lighter wood and make it a bit longer because our second rocket was to small and heavy. I have noticed that most of the videos explain the components of the rocket and how it works and they also talk about how their experience was. I would have put a voice over instead of keeping it silent because it doesn't have as much depth compared to the ones with the voiceover. I see some value in being able to make a film because you learn how to make a film if you didn't know how to and you will never know when it might come in handy. I plan to put voice overs on my next film and keep it interesting so people won't get bored. Ill make it have some comedy but still have valuable information On our second build we had the same task of making a balsa rocket with a 3'' by 18'' piece of balsa wood and another bottle of glue but this time we had a better understanding of what to do with our rocket so we tried something new the result was unexpected.
For this project we were given a 3'' by 18'' piece of balsa wood and a bottle of super glue. we were told to make a rocket with the materials provided and this is the process of that Reflection: our first rocket did more than we expected it got off the launch pad I think next time we will try and make it smaller with bigger fins to make it more aerodynamic.
|
AuthorWrite something about yourself. No need to be fancy, just an overview. Archives
December 2016
Categories |


 RSS Feed
